I am one of those knitters who does not mind blocking; I’ve even been know to offer to block other peoples items. And when I block something like a shawl, it is blocked to it’s last inch of it’s life. If you are going to block something, you may as well BLOCK it, right?
Last fall my design Nymphalidea was published in Knitty’s Deep Fall 2013 issue and I’ve been meaning to write up a photo tutorial on how I’ve blocked mine. There have been a ton of different approaches taken by knitters who have made this shawl as well as questions on what to do with it once off the needles. Some have blocked the top point into a swirl, some have straighter it out, some have altered the pattern to naturally have a straighter edge and on and on. So here’s what I’ve done for blocking the shawl knit per the pattern instructions.
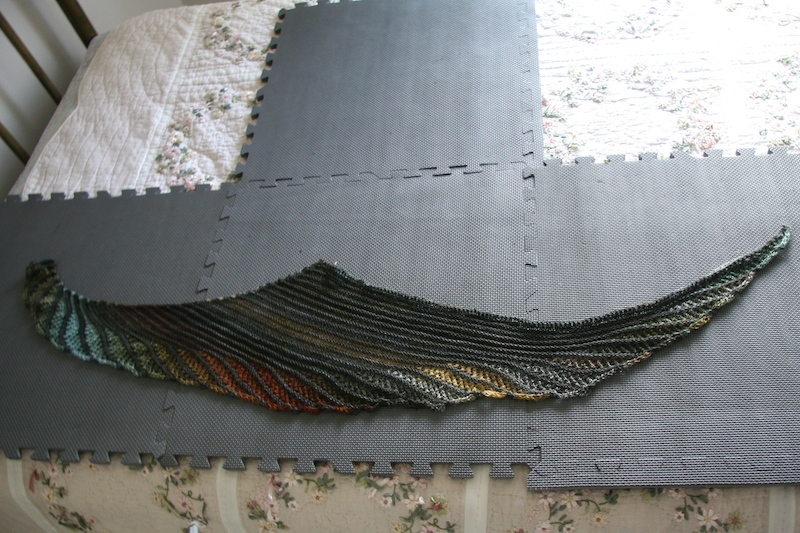
When first off the needles, you will have a shape that looks like an up-side-down triangle with the short edges being the left selvage and the bound-off edge and the lace (right selvage) as the long edge.
I soak my pieces to be blocked with Soak and warm (100?F or about the temperature you wash your hands in) water and let it sit for at least 20 minutes. After it’s soaked, the water is drained and any excess is squeezed out. Lay the wet piece out in a large bath towel, fold and roll up the towel and stand on the towel roll to get the majority of the water out.
I use blocking wires, this is shown using the lace weight wires from Fiber Dreams and highly recommend a set in both the lace and worsted weight.
I first thread a wire thru the left selvage edge stitches. You do not need to be precise on where the wire goes thru, just try to hit at least every welt edge and make sure to go between stitches instead of puncturing the yarn.
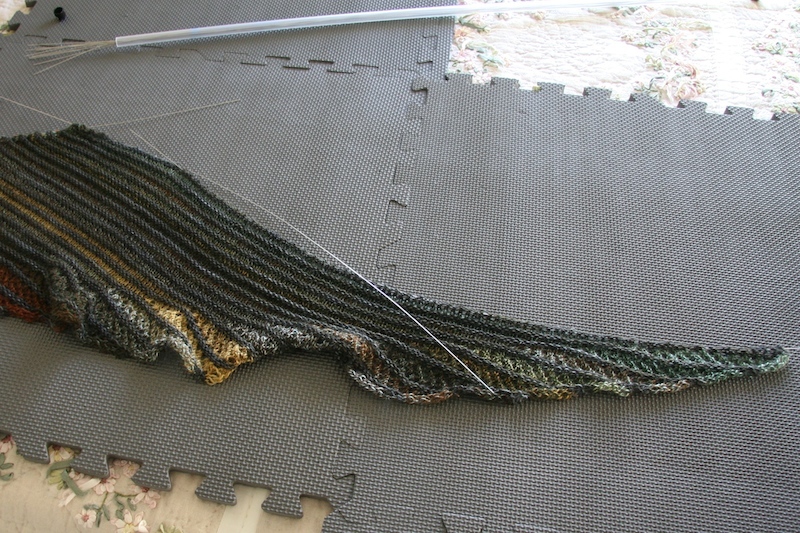
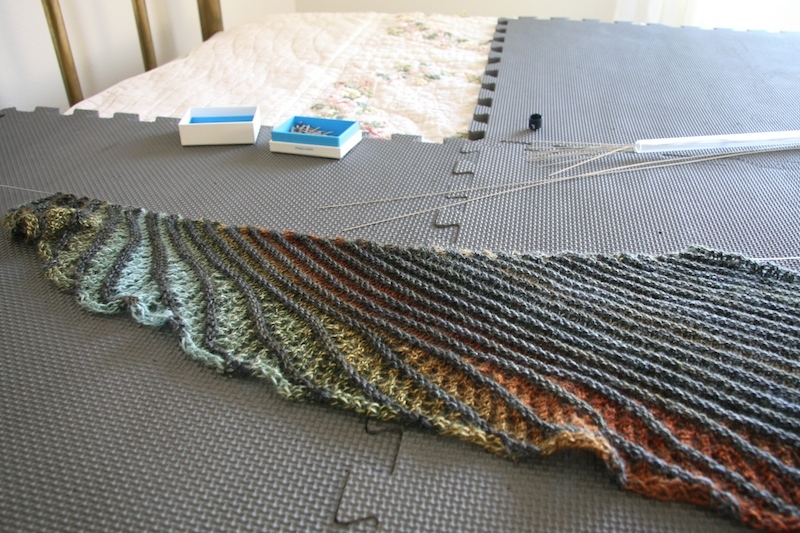
Next I thread a second (and third depending on the length) wire thru the bound-off edge stitches. Since the piece will be stretched when pinned out, you want to make sure to leave some spare wire at each end.
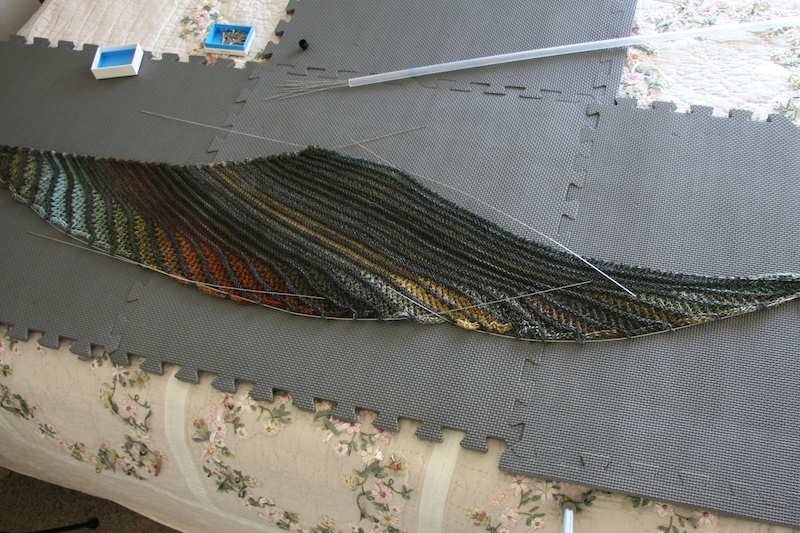
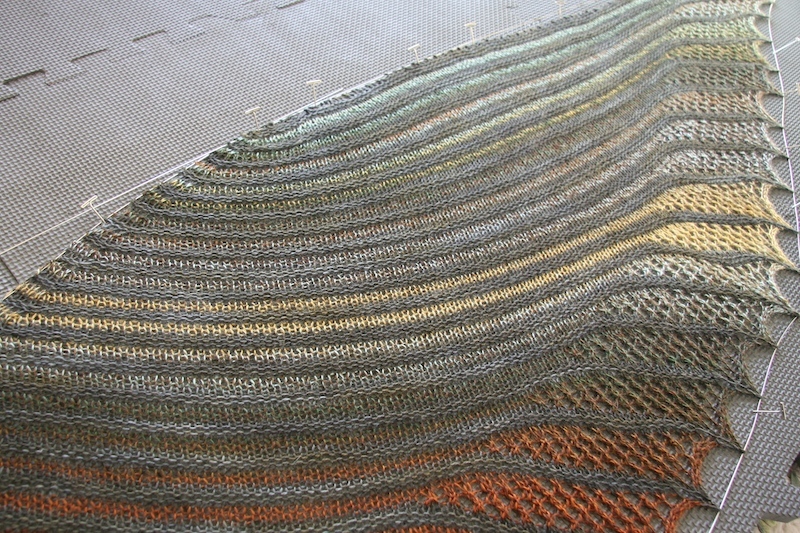
Next wires are threaded thru the lace edge at each welt – for mine, I used three wires on this edge

Since this edge is going to be pulled out into points, I thread the wires thru the welt at about the second stitch from the edge to give it a little more stability when pulled out. If going into the very edge stitch, that stitch could get distorted and pulled instead of the entire welt coming along with it.
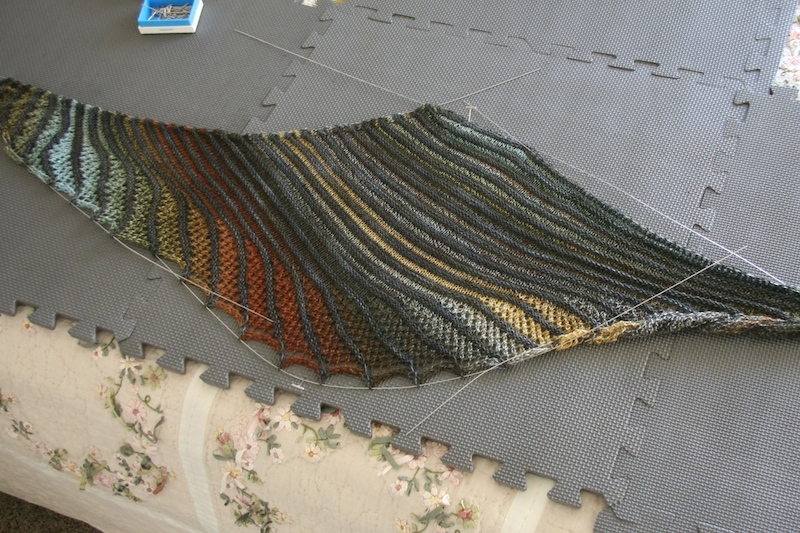
Now that all the wires are in place, I begin by placing a pin at the bottom center and top center. It does have to be exact and for these first pins, you don’t want to pull too much from the original shape – just stabilize it.
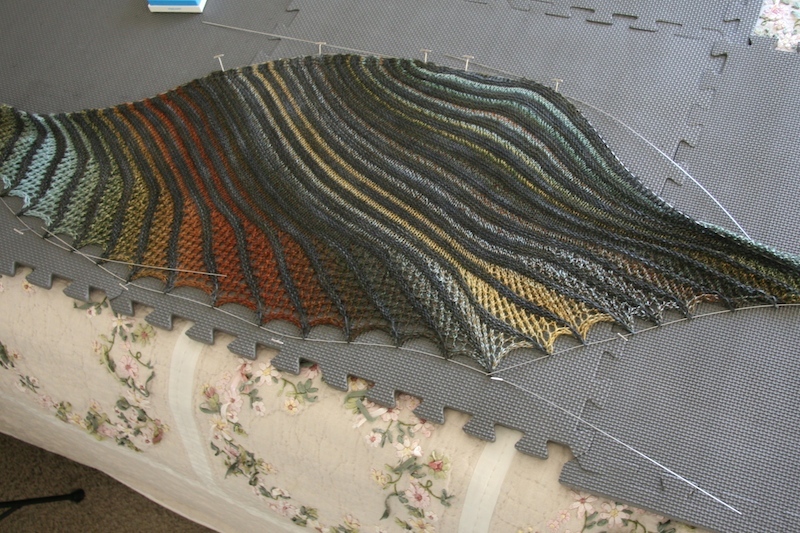
Now is when you really begin to form the shape. Starting at the top center, begin adding pins outward to the right and left to create a smooth top line. As you go, pull the length out side to side. Add a few pins along the bottom edge to begin creating it’s crescent shape.
Adjust pins as you go to get smooth lines and a shape you are happy with. The thing I love about using the wires is how easy it is to re-arrange the shape without having to pick up and move a hundred pins.
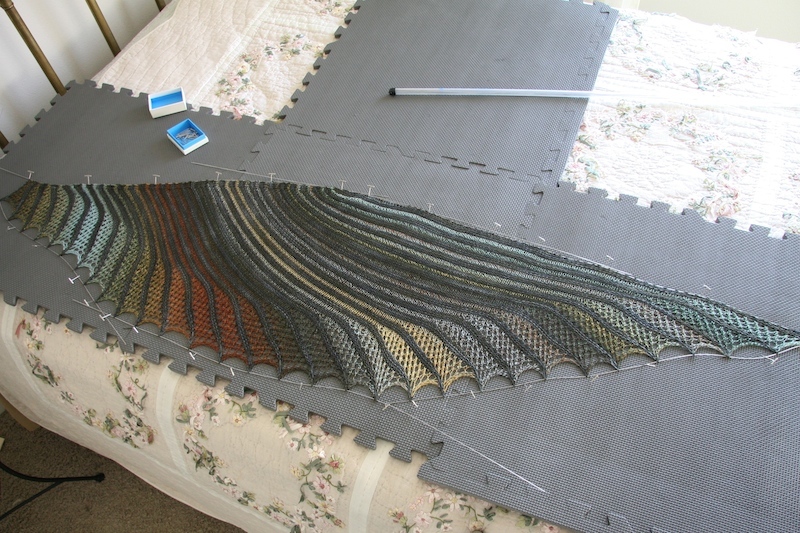
I generally begin without a ton of tension and a few pins. Then once it begins to take shape, pull the wires outward and move the pins out to where the wire is pulled to. In the photo above, I would probably move the pin at the bottom edge where the aqua color is on the left out a little more and the ones at the yellow/grey area to the right of the center inward a little.
With sock and lace weight yarn, you have to work pretty quickly to have it still damp by the time all the pins are placed. And you want to leave the wires and pins in place until it is 100% dry. Depending on your climate, the yarn weight and how much moisture you removed before beginning, this could be an hour or several days for a bulky project.
Once the pins and wires are removed, the piece will relax a bit, so if you are wanting a specific width/length after it is blocked, and blocking pretty aggressively, you may want to pull it out just little more to compensate for it bouncing back a little.
The nice thing about blocking, is it is totally reversible and if you block it one way and want to change it, it only takes the time/effort to do it again.